This article outlines the steps for creating a signing in the new version of Authentisign (referred to as Authentisign 2.0).
There are a couple different ways for you to access Authentisign right from the SmartMLS Member Dashboard:
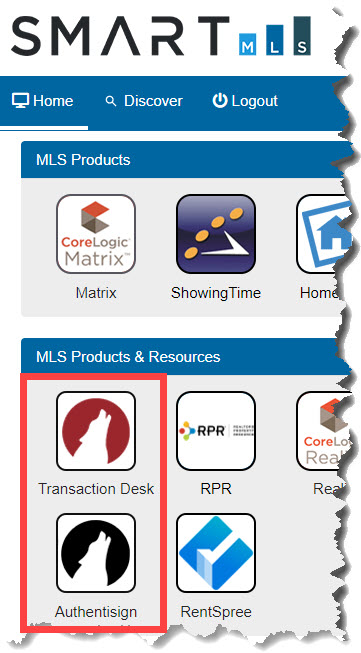
You can use either the TransactionDesk or Authentisign icons within the MLS Products & Resources section.
If you start off by clicking the TransactionDesk icon, click the signings icon on the left side of the screen:

Click the Add icon in the upper right to add a new signing:

You may now start creating your new signing.
If you begin the process by clicking the Authentisign icon (instead of opening TransactionDesk first), it will bring you directly to the Create Signing window:

The Signing Name field is required. Make sure to use a name that you will easily recognize. Generally, naming the signing after the intended recipient or the address of the property is a good rule of thumb.
If you need to associate this signing with an existing transaction, use the Transaction drop down menu to select the appropriate one. This is an optional step. You can always associate the signing with a transaction at a later date if necessary.
For the purposes of this article, we are not associating the signing with a transaction.
Click Save .
When the next screen opens, click Add a Document or Form :

You can add the document/form that needs to be signed in several ways:
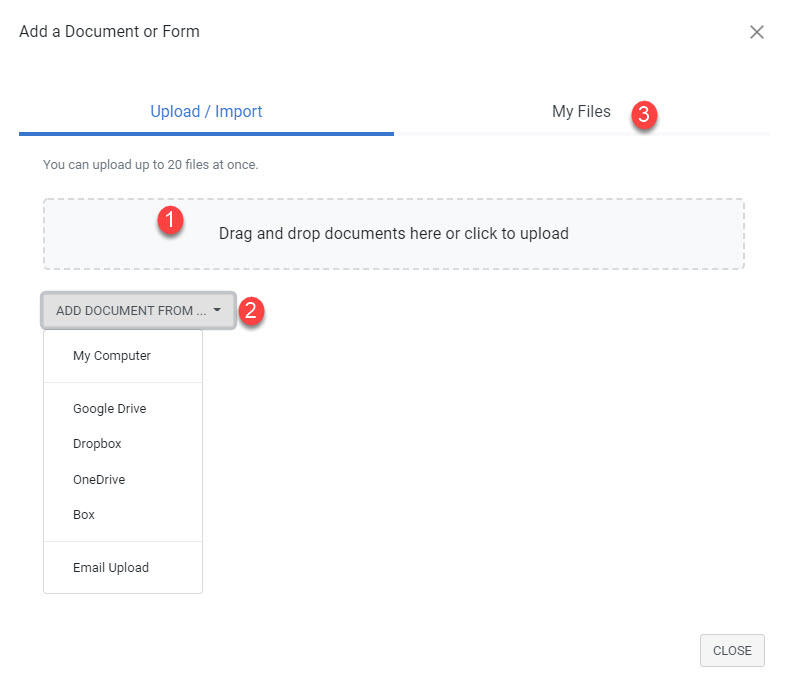
- You can drag and drop the document from your computer into the shaded area.
- You can use the Add Document From drop down menu to manually search for the desired document.
- Click My Files to add a document from one of your TransactionDesk libraries. Click here for detailed instructions on this method.
Once you have added the desired document, it is time to add the signers (also known as Participants).
Click the Signers button in the upper right corner, then click Add Participants and choose from the list:
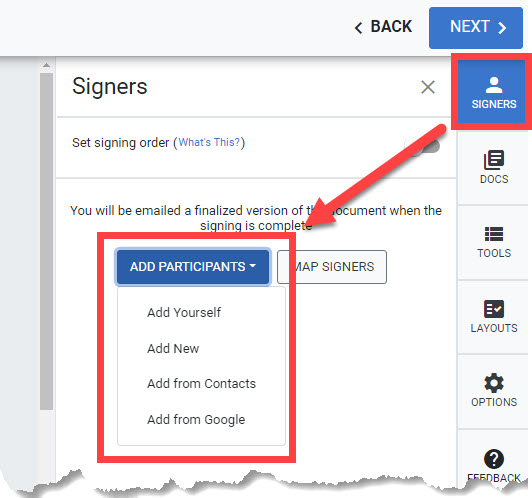
- Click Add Yourself to make yourself a signer on this document.
- Click Add New to create a new contact within Authentisign.
- Click Add from Contacts to choose a signer from your Authentisign contacts.
- Click Add from Google to select a signer from your Google account.
Regardless of how you add your Participants, you need to make sure that there is at least one signer-type (Buyer, Seller, etc.) participant for every signing.
If necessary, you can set a specific order in which the signing must take place. Just click the Set signing order slider bar:
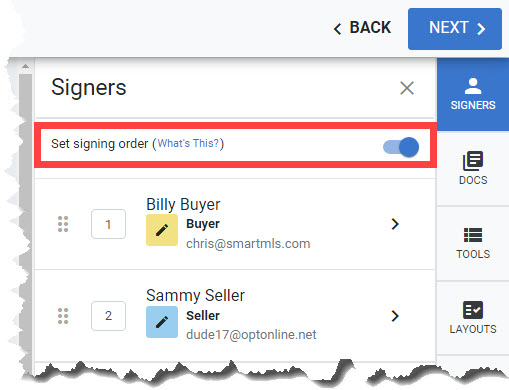
You can then rearrange the signers so your desired signing order is achieved.
As you add Participants, Authentisign will try to add their action items (signature and initial blocks) to their corresponding spots, based on the Role (Buyer, Seller) you've assigned them.
In the example below, we have added one seller and one buyer (using the Add from Contacts option). The corresponding color-coded blocks (yellow for the buyer and blue for the seller) were added automatically because the contacts we chose had defined roles when they were added to TransactionDesk.
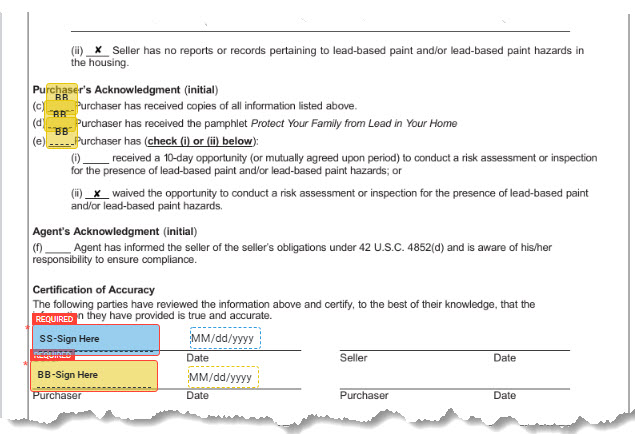
Even though the signature blocks were added automatically, you are still able to drag them to a different spot, if necessary.
If you need to manually add action items for any of the Participants on this signing, click the Tools button on the right side of the screen:
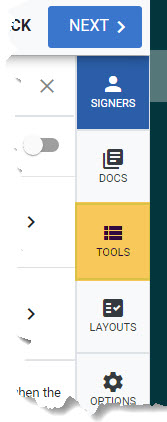
Use the drop down menu to select the desired Participant and then select the specific action you need them to perform on the document (signature, initial, etc.):
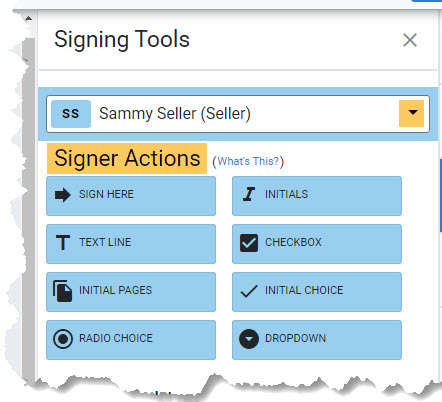
You can either drag and drop the action to its appropriate place on the document directly from the Signing Tools section or click once on the action to add it to the document and then drag it to it's final place from there.
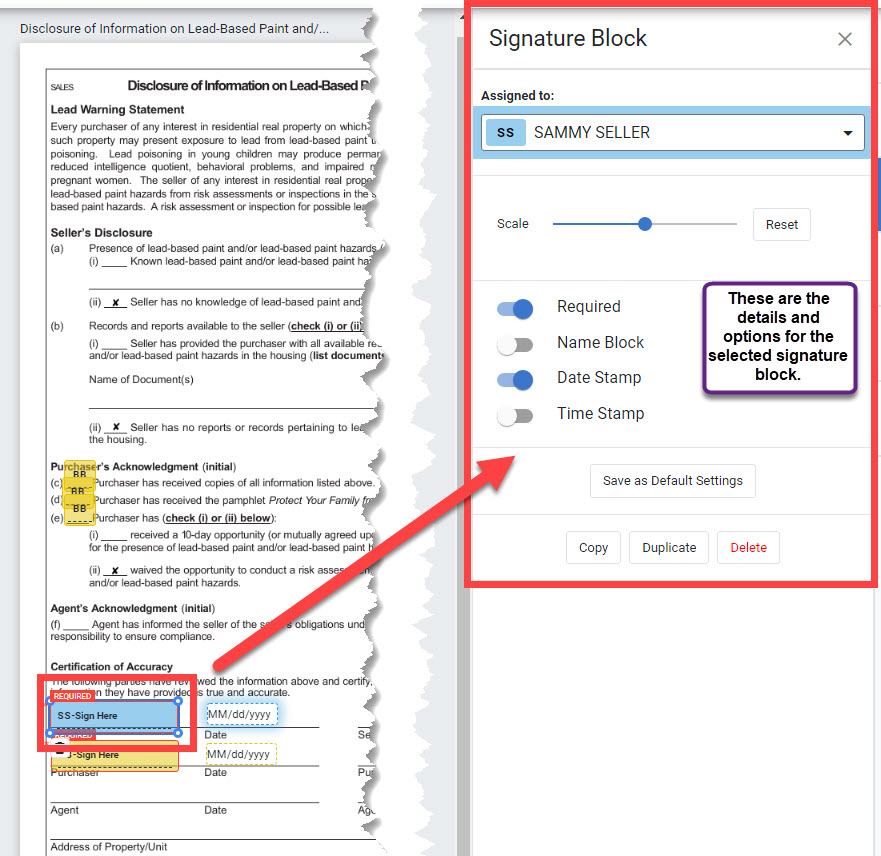
If you click on any of the signer actions you have added to a document, you can see its details and settings on the right side of the screen:
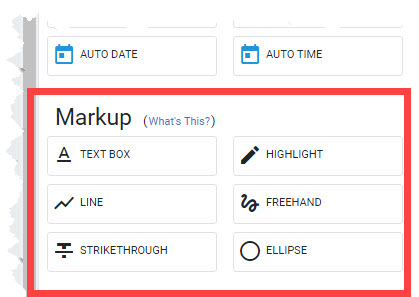
There is a Markup section at the bottom of the Tools menu that allows you (as the creator of the signing) to add notes, highlights, etc. to the document before it is sent out for execution:
When you're done adding signers, setting up signer actions and marking up the document, click the blue Next button in the upper right corner:
That brings up the Finalize Signing Setup window:
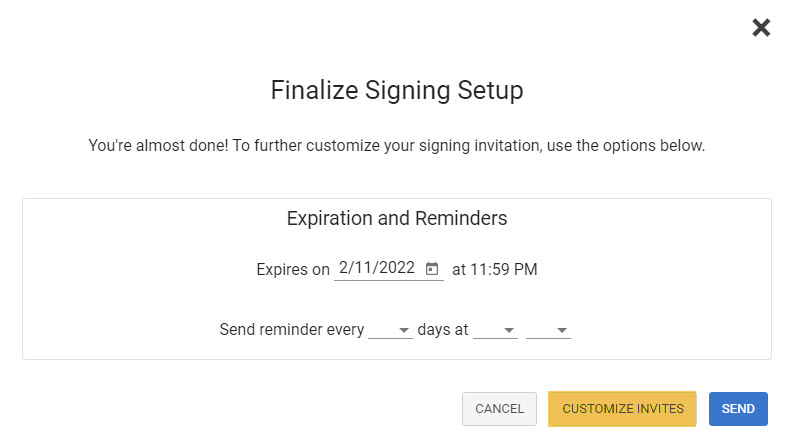
By default, the signing invitation expires at the end of the 30th day after it is sent to the Participants. You can change this time frame if necessary. You can also set up reminders to be sent to your signers.
Click Customize Invites to enter a custom email subject and/or message to each of your Participants.
Click Send when you are done.
The signing invites will be sent to all of the Participants and you will be returned to the Authentisign Signings screen:

This screen shows the current status of all of your signings, with the most recent showing at the top of the list. You can return to this screen at any time to check on the status of your signing.
Click on the name of the signing (on the left side of the screen) for details about it:
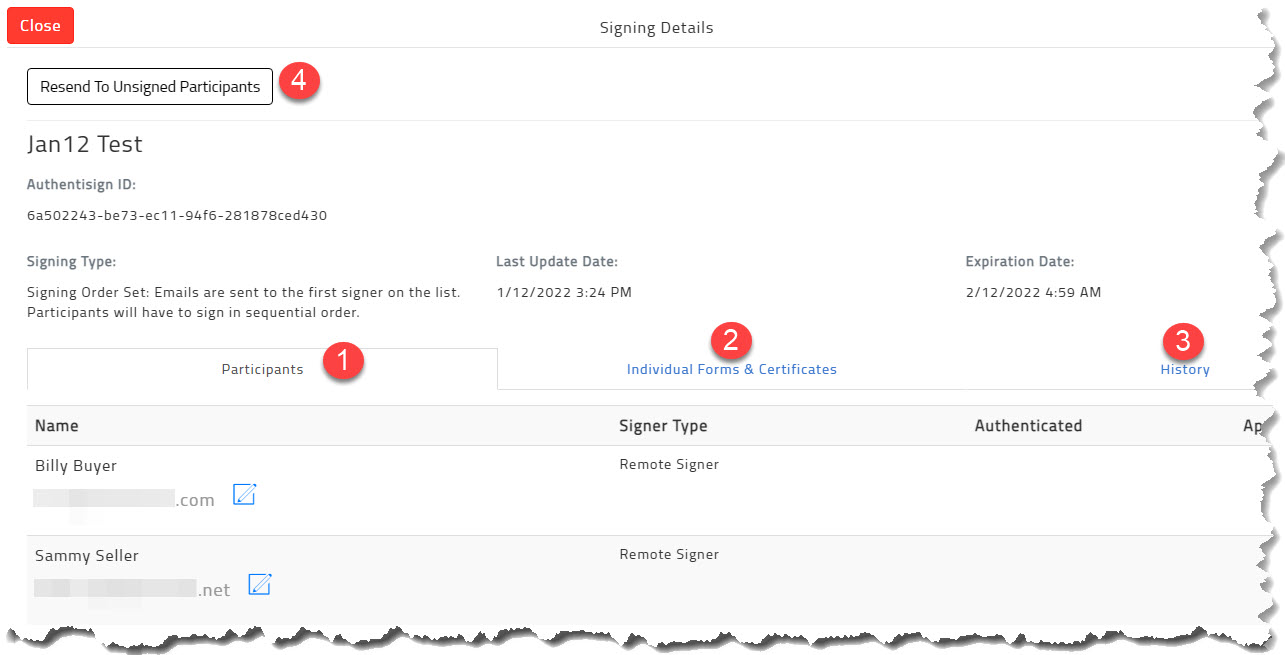
- Participants shows you all of the signers on the document. You can edit their email address by clicking the blue pencil icon.
- Individual Forms & Certificates shows you the document(s) associated with this signing.
- History tracks all of the events of the signing- when it was created, when Participants were added/removed, where/when it was sent, etc.
- You can resend the invitation to any Participants who have yet to sign it by clicking the Resend to Unsigned Participants button in the upper left.
Here is an excellent video that LoneWolf has provided that walks you through the steps of creating a signing in Authentisign 2.0:
Comments
Please sign in to leave a comment.